September 29, 2009

My Favorite Reader

Wow, it's been a while since I've last updated. It feels like aaaaages ago, but NYC was so much fun. We got to cruise the Hudson River with friends, attend a beautiful Turkish wedding, shop in Soho, spend some quality time with family...and of course, eat like there's no tomorrow (because no vacation is a real vacation without gluttony!). But before I dive into all the juicy details, I wanted to quickly honor someone very close and dear to my heart -- my grandmother.

My grandmother taught my mother how to cook, and in turn, my mother taught me how to cook. So I guess a large part of my cooking "knowledge" (if you can call it that) can be attributed to her. The only difference, however, is that my grandmother cooked these incredible, multi-course Chinese dinners every night for a family of 6, my mother cooked equally delicious dinners each night for a family of 4....and I squeeze out these 1-course dinner experiments every now and then for a family of 2 :)

Despite the fact that my cooking was probably mere child's play to her, my grandmother was one of my most enthusiastic and loyal readers. She loved reading this blog, and would always exclaim "Everything looks so delicious! Where were you and this blog when I needed it?" whenever I would see her. She and my grandfather even tried the spicy chicken recipe I posted a couple of weeks ago! I couldn't have imagined a more heartfelt reader, or even better grandmother.

We unfortunately lost her this past week, and the absence of her warmth, generosity and kindness has been felt immensely. It's been a really rough couple of days...but if anything has come out of this, it would have to be the overwhelming amount of love and support that everyone has shown us. Thank you friends and coworkers for the flowers, kind notes, and cookies.

More importantly, I had no idea how therapeutic it would be to spend almost every day and meal together with relatives this past week. Family has been such a huge blessing and necessity to all of us. Of course, in true Chung fashion, we haven't just been hanging out at my grandfather's place. Food has gathered us together...and I'm talking platefuls and platefuls of prime rib, homemade salads, pesto chicken & sausage pasta, oven-baked french fries, bbq baby back ribs, apple pie, fresh fruit, biscuits and honey, spice cake and cookies -- oh I've been trained well. PauPau, we miss and love you always. May you rest in peace...


Years ago, at a family vacation in Monterey Bay. We're missing a couple of our younger cousins; don't hate on the glasses.


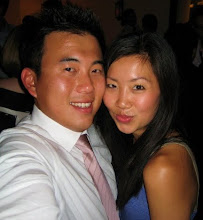
May, 2009 at our wedding in Sausalito.

Continue reading for recipe...

September 18, 2009

Sour Cream-Streusel Coffee Cake for NYC!


Off to NYC! :D

The last time we were in New York was almost 3 years ago when AC used to live there, so we're pretty excited. While our visit is already jam packed with wedding festivities, work, dinner engagements, and of course, family time...I still want to try to sneak a meal in at one of David Chang's infamous restaurants. What I've literally been thinking about all day is (no joke), Momofuku ssam bar or noodle bar -- suggestions, anyone?!


Anyway, here's some coffee cake that I made for our lovely host who will be graciously sharing her tiny NYC apt with us all week. Sour cream cakes are one of my favorite because they're extra moist and tender. This one gets bonus points from its delicious cinnamon/walnut streusel, which when layered into the batter, gives the soft cake a wonderful texture and flavor.


Oh, you know I'm packing some of this with us for our upcoming 6-hour long transcontinental flight. ;) NYC, here we come!

Sour Cream-Streusel Coffee Cake
Adapted from Bon Appetit, December 1998

1 1/4 cups coarsely chopped walnuts
1 1/4 cups (packed) golden brown sugar
4 1/2 teaspoons ground cinnamon
4 1/2 teaspoons unsweetened cocoa powder

3 cups cake flour
1 1/2 teaspoons baking soda
1 1/2 teaspoons baking powder
3/4 teaspoon salt
3/4 cup (1 1/2 sticks) unsalted butter, room temperature
1 1/2 cups sugar
3 large eggs
1 tablespoon vanilla extract
1 16-ounce container sour cream

1 cup powdered sugar
1 tablespoon milk

Preheat oven to 350°F. Butter 12-cup Bundt pan. Mix first 4 ingredients in small bowl. Set nut mixture aside. Sift flour, baking soda, baking powder and salt into medium bowl. Using electric mixer, beat butter and 1 1/2 cups sugar in large bowl until blended. Beat in eggs 1 at a time. Mix in vanilla. Mix dry ingredients and sour cream alternately into butter mixture in 3 additions.

Pour 1/3 of batter into prepared pan. Sprinkle with half of nut mixture. Spoon 1/3 of batter over. Sprinkle with remaining nut mixture. Spoon remaining batter over.

Bake cake until tester inserted near center comes out clean, about 45 minutes. Cool cake in pan on rack 10 minutes. Cut around pan sides to loosen cake. Turn cake out onto rack and cool 1 hour. Transfer to platter.

Whisk powdered sugar and milk in small bowl until smooth. Drizzle over coffee cake. Serve slightly warm or at room temperature.
Continue reading for recipe...

September 16, 2009

Sachi, the Dog


The other day, my friend asked why we don't have any pictures of Sachi on this blog. I really couldn't think of a reason, so here are a couple of photos of our dog in her "element."

The first picture is sooooo typical of her. Like I said before, she's totally a cat. You can find her lounging around our apartment soaking up the sun like this, oh.....90% of the time.

The second picture cracks me up -- she is never this alert and attentive unless she's begging for food (of course). And believe me, she's absolutely relentless when it comes to this!


Recipe for this cuteness (and insanity)? 100% shiba inu with some love thrown in ;)
Continue reading for recipe...

September 13, 2009

Korean Banchan: Cucumber Salad + Bean Sprout Side Dishes


Wow. I've just been a lean, mean Korean-cooking machine lately! Not only did I make kimchi jjigae this week, but I also ventured into the world of banchan. This is another dish that AC usually makes...but as said before, watch and learn baby! ;)

Korean banchan, or all the little side dishes that come out with your meal, is one of my favorite things about eating at Korean restaurants -- it seriously makes you feel like a king! I love looking around the table, and seeing 10+ dishes sitting out with your main order. If you're greedy like me, it is theee way to eat :)

Anyway, we sometimes buy our banchan from Korean grocery markets so that we can eat them at home as well. They're always good...but a little expensive for what you get. So lately, AC has been making some of the banchan dishes himself -- and I actually think they taste BETTER than the store bought kind. These are my two favorites. As you can see, they are ridiculously delicious and easy to make.

Cucumber Salad
Recipe by AC/SC

5 large English cucumbers (10 mini cucumbers)
1/4 C rice vinegar
1 T sugar
1 clove garlic, minced
1 T sesame seeds
1 T sesame oil
1/2 T kochu'karu (hot red pepper powder)
1 wedge lemon

Seed the cucumber, and slice into thin disks. Place cucumbers in a large bowl and sprinkle evenly with sea salt (about 1/4 T). Let sit for 15 minutes, and the wrap the cucumbers in a paper towel and squeeze out as much liquid as possible. Set aside.

Combine rice vinegar, sugar, garlic, sesame seeds, sesame oil, and kochukaru in a medium bowl. Add cucumbers and toss well. Squeeze lemon juice over salad. Cover and refrigerate.


Bean Sprout Side Dish
Recipe adapted from Week of Menus

1 bag of bean sprouts
2 tablespoons of water
1 tablespoon of vegetable oil
1/4 teaspoon salt
3 cloves of garlic finely chopped
2 green onions finely chopped
1 tablespoon of sesame oil (you can add more if you like the taste)
1/2 T crushed toasted sesame seeds

Wash beansprouts. Place beansprouts, water, vegetable oil and salt in the bottom of a very heavy pot. Cover pot and place on medium high heat. Cook until you see steam escaping from the pot (or you begin to smell the bean sprouts) and reduce heat to medium. Cook for around 10-15 minutes with the lid on.

While still hot, add the garlic, green onions, sesame oil, and sesame seeds. Mix. Adjust seasonings as necessary. Serve immediately.
Continue reading for recipe...

September 11, 2009

Kimchi Jjigae (Korean Kimchi Stew)


They say distance makes the heart grow fonder. But I would argue that food, after distance, is what really does it :)

After making homemade marshmallows, having girl time with my lovelies, and shopping until there was literally nothing left to buy...I really was starting to miss AC. And I was only 2 days in! So in preparation for his long-awaited homecoming, I decided to make one of his favorite soups.

I'm not Korean, but I would say living with one has definitely rubbed off on me. Like, I now get it why all Koreans have to keep baking soda in their refrigerator. ;) And I don't think every red-colored food (which is about 85% of all Korean cuisine) is spicy anymore! In fact, the spicier the better. Anyway, our kimchi was getting riiiiiiipe (you'll understand if you're Korean) and hadn't been touched in days. I was tempted to throw it out...but the Korean in me knew better -- ripe kimchi is perfect for kimchi jjigae!


This was actually my first time making kimchi jjigae by myself, but I had watched AC make this soup so many times that I had a pretty good idea of what to do. Watch and learn, right?? Anyway, I must have had a great teacher because I couldn't have been happier with the results :D

The soup's main components are pork belly and kimchi, which are two delicious foods that you really can't go wrong with. Combine that with fresh vegetables and a light yet flavorful broth, and you have this incredibly satisfying soup that always comforts both your belly and soul. Served hot and bubbling, this spicy soup is best when hungover or on a cold, rainy night....or for lunch, or in the summer, or whenever you just want something tasty to eat :P


Kimchi Jjigae
Recipe by AC/SC

6 cloves garlic, minced
1 T sesame oil
1/2 lb pork belly
1/2 large white onion, diced
2 T kochu'jang (red pepper paste)
6 C anchovy stock ---> 6 C water + dried anchovies enclosed in a mesh ball
4 oz (half a container) mushrooms, quartered
1 zucchini, diced
7 oz (half a container) tofu, cubed
2 1/2 C kimchi
3/4 C kimchi juice

To make the soup stock, boil water and dried anchovies for about 10 minutes in a medium pot. Discard dried anchovies from broth, and set aside.

In a large pot, fry the garlic in sesame oil until fragrant, about 1 minute. Add pork belly and chopped onions and stir until just cooked, about 3-5 minutes. Add kochu'gang and mix until it evenly covers everything. Add anchovy stock and bring to a boil.

Mix in mushrooms, zucchini, and tofu. Add kimchi and juice. Season to taste.
Continue reading for recipe...

September 08, 2009

Matcha Green Tea Marshmallows


Happy Labor Day! I hope everyone had an enjoyable and restful holiday -- I know I did! AC was actually in Seattle this weekend, so good ole' Sachi and I got the entire apartment to ourselves. This was the first time AC and I had been apart since we got married, and at first it was a little weird. BUT, I was able to make homemade marshmallows in his absence...and go on guiltless (well kinda) shopping sprees, watch chick flicks, and have girl time as well :D

Anyway, I've been wanting to make homemade marshmallows ever since I walked past Miette Patisserie and saw how ridiculously cute and trendy their homemade marshmallows were. How could you not want lavender, honey or vanilla flavored clouds of fluff? The sophisticated flavors worked well with their light and airy textures, and I couldn't stop thinking about how tasty they'd be as smores, or in a hot beverage, or in my mouth...again.

With that inspiration in mind, I was determined to make my own version. Only, it didn't go quite as smoothly as I had envisioned. Between beating the marshmallow mixture into a fluff and transferring it to a baking pan, I somehow managed to make a complete mess. And I don't mean flour all over the kitchen kind of disaster. This was much more serious where there were cobwebs and cobwebs of gooey, marshmallowy strings EVERYWHERE. In my hair, on the counter tops and floor, shirt, pants -- not to mention my hands, which were so covered in sticky goo that anything I touched (like the sink faucet to wash my hands in) became part of my cobwebbed mess.


What, this picture doesn't make you want to run out and make homemade marshmallows yourself? :P You know when you bite into a marshmallow, and your eager fingers accidentally touch the sticky center and become glued together for the rest of the night? That's exactly what this was like, only ten times worse because the entire marshmallow mixture was sticky...which meant that if you somehow ended up touching any of it, you were doomed. So lesson learned (the hard way): refrain from using your fingers to scrape/wipe off any stray batter!

However, despite the mess (and panic) that was created, I was able to regain composure and churn out a pretty respectable marshmallow given the hurricane my kitchen went through. :) Light, fluffy and delectably soft, they were exactly as I had envisioned if not better. I also dipped a couple of them in milk chocolate to mitigate the slight bitterness of the green tea, which turned out to be a fantastic idea. If only I had some graham crackers...


Homemade Marshmallows
Adapted from Bon Appetit, July 2008

Nonstick vegetable oil spray
1 cup cold water, divided
3 1/4-ounce envelopes unflavored gelatin
2 cups sugar
2/3 cup light corn syrup
1/4 teaspoon salt
2 teaspoons matcha green tea powder

1/4 cup corn starch
1/4 cup powdered sugar
1/2 t matcha green tea powder

Line 8x8x2-inch metal baking pan with foil.

Coat foil lightly with nonstick spray. Pour 1/2 cup cold water into bowl of heavy-duty mixer fitted with whisk attachment. Sprinkle gelatin over water. Let stand until gelatin softens and absorbs water, at least 15 minutes.

Combine 2 cups sugar, corn syrup, salt, and remaining 1/2 cup cold water in heavy medium saucepan. Stir over mediumlow heat until sugar dissolves, brushing down sides of pan with wet pastry brush. Attach candy thermometer to side of pan. Increase heat and bring syrup to boil. Boil, without stirring, until syrup reaches 240°F, about 8 minutes.

With mixer running at low speed, slowly pour hot syrup into gelatin mixture in thin stream down side of bowl (avoid pouring syrup onto whisk, as it may splash). Gradually increase speed to high and beat until mixture is very thick and stiff, about 15 minutes. Add 2 t matcha green tea powder and beat to blend, about 30 seconds longer.

Scrape marshmallow mixture into prepared pan. Smooth top with wet spatula. Let stand uncovered at room temperature until firm, about 4 hours.

Stir cornstarch, powdered sugar and 1/2 t matcha green tea powder in small bowl to blend. Sift generous dusting of starch-sugar mixture onto work surface, forming rectangle slightly larger than 8x8 inches. Turn marshmallow slab out onto starch-sugar mixture; peel off foil. Sift more starch-sugar mixture over marshmallow slab. Coat large sharp knife (or cookie cutters) with nonstick spray. Cut marshmallows into squares or other shapes. Toss each in remaining starch-sugar mixture to coat. Transfer marshmallows to rack, shaking off excess mixture.
Continue reading for recipe...

September 05, 2009

Chewy Chocolate Chip Cookies


You can't go wrong with classic chocolate chip cookies. Especially if they're crisp and chewy along the edges, and soft (and melty!) in the center. I have made sooooo many chocolate chip cookies in my life, and I think that these do a pretty good job of attaining that oh-so-coveted chewy/soft ratio.

While I'm skeptical that the following "tricks" are the primary drivers behind this cookie's crisp and chewy exterior, I'll share anyway...and you can determine if you think it's a bunch of baloney or not. :P First off, you use melted butter instead of normal butter when creaming it with sugar. I've never heard of this before, and am not sure why it's necessary -- especially if it requires you to refrigerate the dough afterwards. Secondly, when taking the cookies out of the oven, you need to let them sit for a couple of minutes before transferring them to a cooling rack. Supposedly this helps to make them crispy. Because of this, it's crucial that you don't over bake the cookies since they will be cooked even more on the hot baking sheet. In fact, I don't think it hurts to slightly under bake them.


Anyway, miracle makers or not, these extra steps make a damn good chocolate chip cookie. Oh, and I almost forgot. Eating them straight out of the oven also doesn't hurt ;)


Best Big, Fat, Chewy Chocolate Chip Cookies
Recipe adapted from All Recipes

2 cups all-purpose flour
1/2 teaspoon baking soda
1/2 teaspoon salt
3/4 cup unsalted butter, melted
1 cup packed brown sugar
1/2 cup white sugar
1 tablespoon vanilla extract
1 egg
1 egg yolk
2 cups semisweet chocolate chips

Preheat the oven to 325 degrees. Sift together the flour, baking soda and salt; set aside.

In a medium bowl, cream together the melted butter, brown sugar and white sugar until well blended. Beat in the vanilla, egg, and egg yolk until light and creamy. Mix in the sifted ingredients until just blended. Stir in the chocolate chips by hand using a wooden spoon. Refrigerate dough about 1-2 hours.

Drop cookie dough onto cookie sheets. Cookies should be about 3 inches apart. Bake for 8 to 12 minutes in the preheated oven, or until the edges are lightly toasted. Cool on baking sheets for a few minutes before transferring to wire racks to cool completely.
Continue reading for recipe...

September 03, 2009

Beet Salad with Goat Cheese and Balsamic Vinaigrette


I think the smell of roasted beets might possibly be the most glorious thing to ever come from my oven. Even better than baked goods (and that's saying a lot, considering how much I love my sweets). It's absolutely lovely, and I seriously think someone should make a candle scent after the smell. :P NOT KIDDING!

Anyway, I actually just discovered beet salad about a year ago when my friend ordered it for lunch. What the hell is that, I asked. She let me try a bite (or two), and I was hooked. Soft and buttery, roasted beets are as sweet as fruit -- only they're vegetables. I think beets are tasty enough to eat plain...but when served with soft goat cheese in a tangy balsamic vinaigrette, they are absolutely divine! I added chopped walnuts for extra protein, but I think little bits of juicy mandarin oranges would be even better :)


Beet Salad with Goat Cheese
Adapted from Bon Appetit, June 2000

8 beets
1/4 C white wine vinegar
1/2 t sugar
1/4 C vegetable oil
1/8 C olive oil
1/4 red onion, thinly sliced
crumbled goat cheese, to taste

Preheat oven to 375°F. Wrap beets tightly in foil packages (3 beets in each). Place on baking sheet. Roast beets until tender, turning packages occasionally, about 1 hour 45 minutes. Unwrap beets; cool completely. Peel beets and cut into 1/4-inch-thick rounds. Place in large bowl.

Combine vinegar and sugar. Gradually blend in vegetable oil, then olive oil. Season vinaigrette to taste with salt and pepper. Toss beets and sliced onion in vinaigrette. Sprinkle with goat cheese and serve.
Continue reading for recipe...

September 01, 2009

Grown-Up Potato Salad + Spicy (Oven) Fried Chicken


While I love those classic mayonnaise-based potato salads, I think they should only be eaten during summer barbecues when there are platefuls and platefuls of ribs nearby. I know...so cliche, but kinda true. :P So what to do when craving potato salad, but without any ribs (or grill, or backyard for that matter)?

After trying this recipe, I'd actually recommend ditching the creamy, all-American version for a more "grown up" adaptation instead. 100% mayonnaise-free, this warm potato salad has an unique, almost tangy flavor to it that comes from its whole grain mustard and lemon juice base. The capers, chopped shallots and parsley are also a nice addition which give it a sophisticated and bright taste. And here's the catcher -- it goes with just about everything (which is great for grill-less, backyard-less losers like us!).


I decided to pair this with spicy oven-fried chicken to add some crispiness to the meal. Per my mother's method, I always bake "fried" chicken in the oven...but it's usually with an Asian-based marinade of soy sauce, sherry, sesame oil, garlic and ginger instead. This was my first time making American-style fried chicken (we in Ameeeeerica!), so I wasn't sure what to expect.

Well, the satisfying crunch and crispiness of typical fried chicken was still the same (bonus points for grated parmesan cheese in the breading), but the flavor was much different. The marinade of buttermilk and hot sauce/pepper definitely came through in the chicken meat...and while that was delicious, I think I still prefer the Asian version instead :D

Regardless of marinade, I would highly recommend "frying" your fried chicken in the oven. It tastes exactly like the real thing, but without all the oil and fat.


Potato Salad with Capers, Shallots and Mustard
Recipe from Blue Kitchen

1-1/2 pounds small red potatoes
2 tablespoons olive oil
5 teaspoons whole grain mustard
4 teaspoons lemon juice
1/4 cup capers [chopped if large]
2 tablespoons finely chopped shallots [about 1 medium]
2/3 cup roughly chopped parsley
salt and freshly ground black pepper, to taste

While the potatoes are cooking, whisk the olive oil, mustard and lemon juice together in a small bowl. As soon as the potatoes are cooled enough to handle [but only just—you want this dish warm], slice them into halves and place them in a large bowl. Whisk the dressing again to combine, drizzle it over the potatoes and stir gently with a wooden spoon to coat potatoes. Add the capers, shallots and parsley to the bowl and stir gently to combine. Adjust seasonings with salt [if needed] and pepper. Serve immediately.

Spicy Oven-Fried Chicken
Adapted from Bon Appetit, June 2000

1 1/4 cups buttermilk
1/4 cup extra-virgin olive oil
3 tablespoons hot pepper sauce
2 tablespoons Dijon mustard
2 garlic cloves, minced
2 teaspoons salt
1 teaspoon ground black pepper
1 large onion, sliced
12 chicken thighs with skin and bones

1 cup dry unseasoned breadcrumbs
1/3 cup freshly grated Parmesan cheese
1/4 cup all purpose flour
2 teaspoons dried thyme
1/2 teaspoon paprika
1/2 teaspoon cayenne pepper

Whisk buttermilk, oil, hot pepper sauce, mustard, garlic, 1 teaspoon salt and 1 teaspoon pepper in large bowl to blend well. Add onion, then chicken and turn to coat. Cover; chill at least 3 hours or up to 1 day, turning chicken occasionally.

Place racks on 2 large rimmed baking sheets. Whisk breadcrumbs, cheese, flour, thyme, paprika, cayenne and 1 teaspoon salt in large baking dish to blend. Remove chicken from marinade, allowing excess to drip off. Add chicken to breadcrumb mixture and turn to coat completely. Arrange chicken, skin side up, on racks on baking sheets. Let stand 30 minutes.

Preheat oven to 425°F. Lightly coat the chicken with Pam Cooking Spray. Bake until crisp, golden and cooked through, about 30-45 minutes.
Continue reading for recipe...